To minimize maintenance work it is highly recommended for each vendor to make their own default settings on vendor level. These default settings will always be copied over to every new account (client company) and end user. Naturally all the settings can at any time be changed on account and on end user level, when needed.
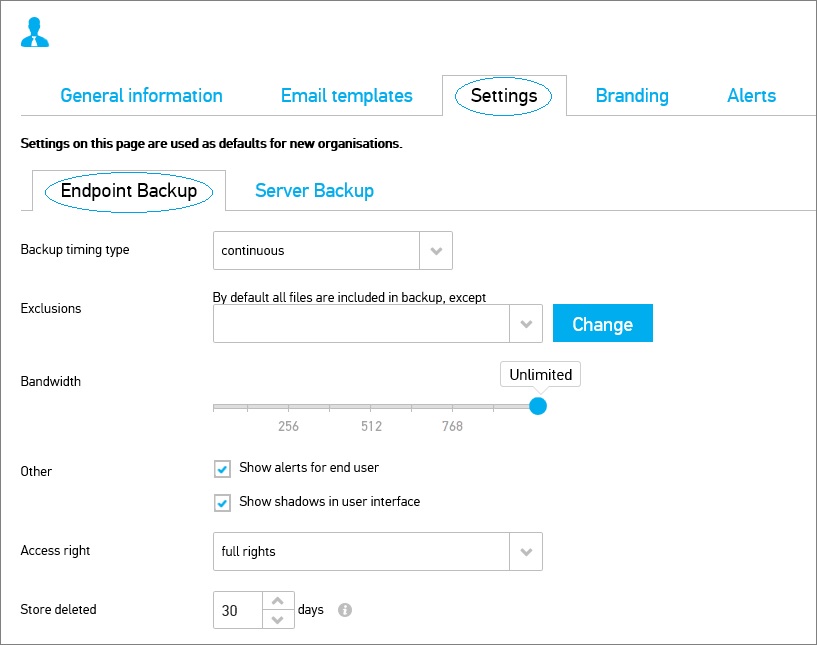
You can find vendor's default settings in Settings tab on Vendor information page.
1) Under Timing there are three different options:
- Turn off - no backups are being made
- Continuous - data is being backed up automatically every few minutes (the recommended option)
- Daily - data will be backed up once a day. You can select time for the daily backup.
2) a) Default data selection: Exclusions approach
By default all the files and folders on end users' computers will be backed up, except for computer's own folders such as System and Program folders, and Windows folder. External drives are also excluded by default. In Exclusions view you can exclude additional folders and content / file types from the backup (compressed files, binaries etc). Click Change and select them from the drop-down menu.
2) b) Alternative approach: Include folders
If you prefer to pick the individual folder(s) you would like to back up from the users' computers, this is also possible. To for example back up Documents under C drive, do the following:
- In Exclusions, click the Change button
- First excluce C drive. Choose Exclude folders from the drop-down menu and type C:\ in the text box.
- If the users have more drives such as D, you need to exclude them also.
- To exclude all internal drives, you can use notation <all_internal_drives>
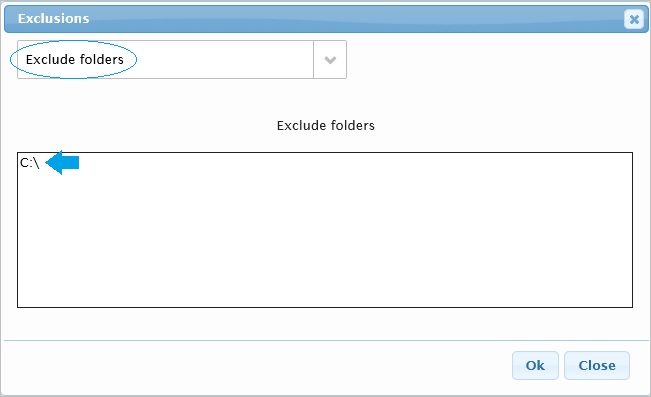
- Next include Documents folder. Choose Include folders from the drop-down menu and type <Documents> in the text box. Alternatively you can also type the folder's complete path.

-> Now only Documents folder will be backed up from the user's C drive.
Please note that only the following folder names can be identified with the <>notation:
<documents>
<desktop>
<public>
<appdata>
<userprofile>
<all_internal_drives>
If you would need to have any other folders included or excluded, please contact us.
⦁ The regular backups will take just a few minutes since only the changed data need to be backed up; also, because the technology adapted by Nexetic is making backup data very fast. For these reasons it is recommended to use Unlimited bandwidth as a default. If needed, the bandwidth can also be adjusted at any time.
4) Show alerts for end users setting allows you to choose whether you would like to alert end users in case of problems - such as failed files, disk space running out etc.
- Full rights: End users can change all basic and advanced settings in their client program.
- Blocked: End users have no right to make any changes to the settings in their client program; only language selection is available.
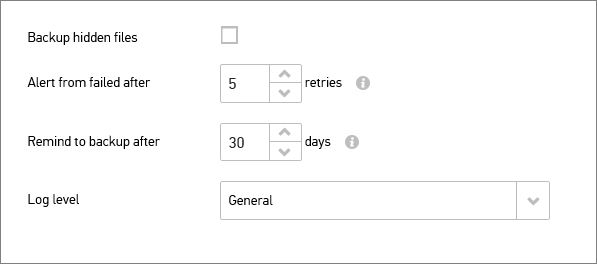
6) Store deleted setting defines for how many days the files that were deleted from end users' computers will be saved among the backups. The default value is 30 days. It can be extended up to 360 days for users with Unlimited license type.
7) You can define whether hidden files need to be backed up by ticking the box Backup hidden files
8) If alerts have been switched on (see section Alerts), the system will send out email alerts for failed backups. By default backup can fail 5 times until an alert is sent out. The setting Alert from failed after refers to this.
9) By default, if more than 30 days have passed since the last backup, the program will send out an email alert. The preferred number of days can be defined in setting Remind to backup after.
10) In Log level you can choose either Low, General or Detailed. Often logging on General level is adequate.
11) After you have finished with adding / adjusting the client settings, remember to choose Save. The changes will come into effect only after you have saved them.