Step 1. Sign into the backup portal
Open your web browser and go to the following address: https://shield-cloud.nexetic.com/
Select Sign in with Microsoft 365. Insert your Microsoft 365 admin credentials for the tenant you want to restore data from.
Resellers can also sign in via Nexetic Portal.
Step 2. Select Backup for Entra ID
Click the icon in the top-left corner of the page and select Backup for Entra ID.
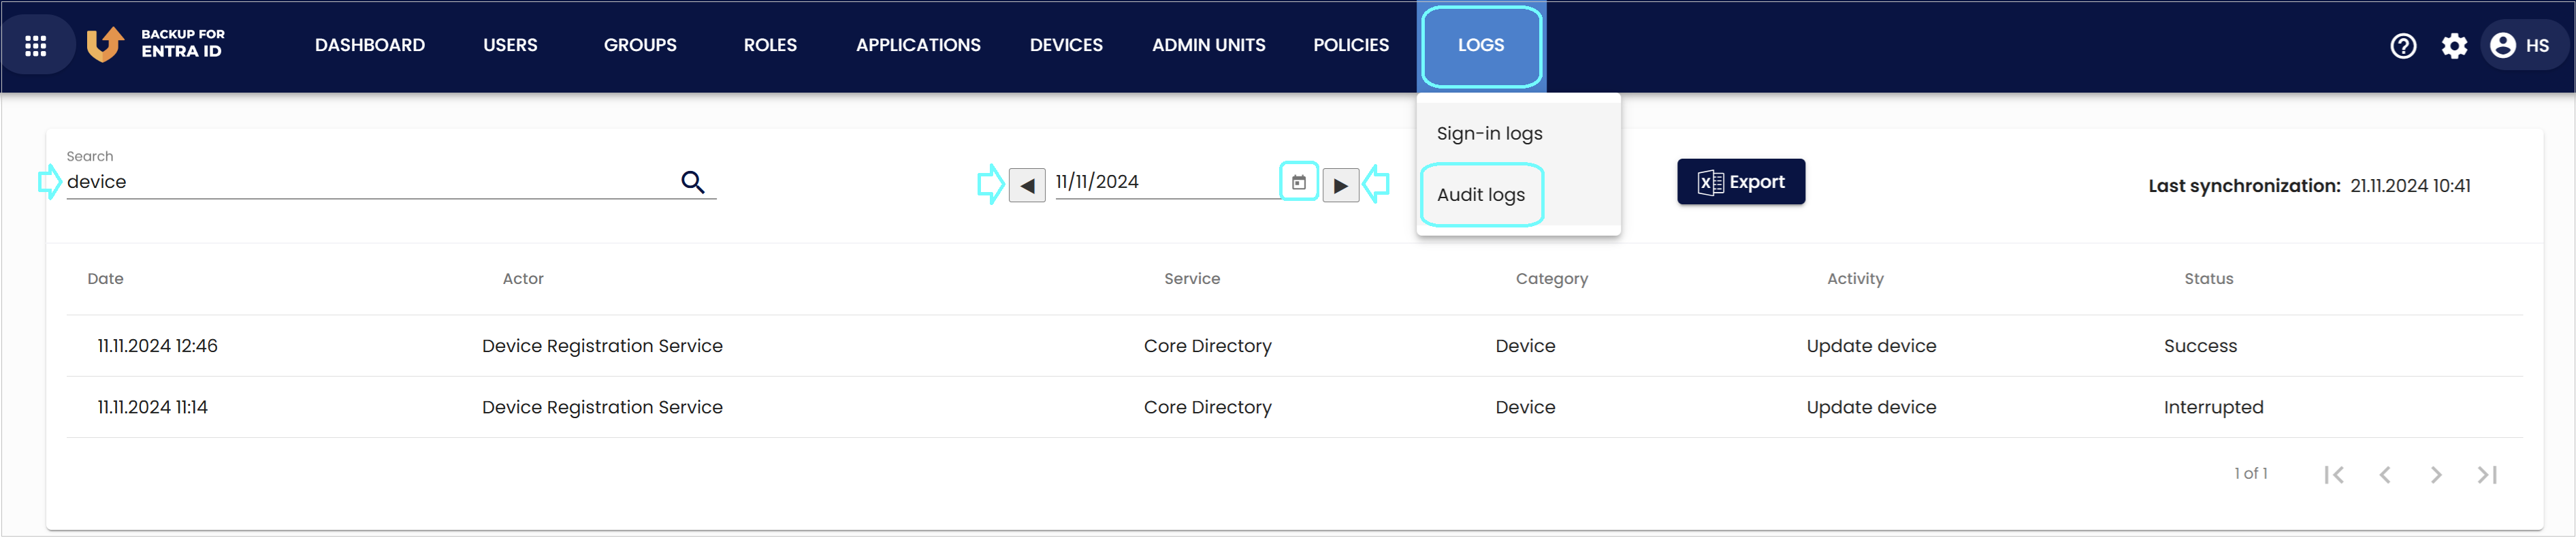
Step 3. Select Audit logs page
Click Logs and Audit Logs in the top navigation. You can see the following details about the audit log events: Date, Actor, Service, Category, Activity and Status.
- You can filter the entries by Service, Category and Activity by typing in the search box.
- Events from the current date / previous backup date are displayed by default. You can select a date from the calendar, or click the arrows to move between dates.
Step 4. View attributes for audit log entries
You can click any entry row to view all the backed-up attributes and their values.
Step 5. Export audit logs
You can download the audit logs to your workstation as an Excel worksheet (.xlsx) by clicking the Export button. Next, you will need to select a specific time range for the export. Please note that if any filters have been applied, only the filtered entries will be included in the download. For example, if you filter the audit logs by the search term 'device' and define a time range from November 1 to November 21, 2024, only audit log entries matching the search term 'device' within that date range will be downloaded. The Excel worksheet will be saved in your Downloads folder.