Step 1. Sign into the backup portal
Open your web browser and go to the following address: https://shield-cloud.nexetic.com/
Select Sign in with Microsoft 365. Insert your Microsoft 365 admin credentials for the tenant you want to restore data from.
Resellers can also sign in via Nexetic Portal.
Step 2. Select Backup for Entra ID
Click the icon in the top-left corner of the page and select Backup for Entra ID.
Step 3. Select Enterprise applications page
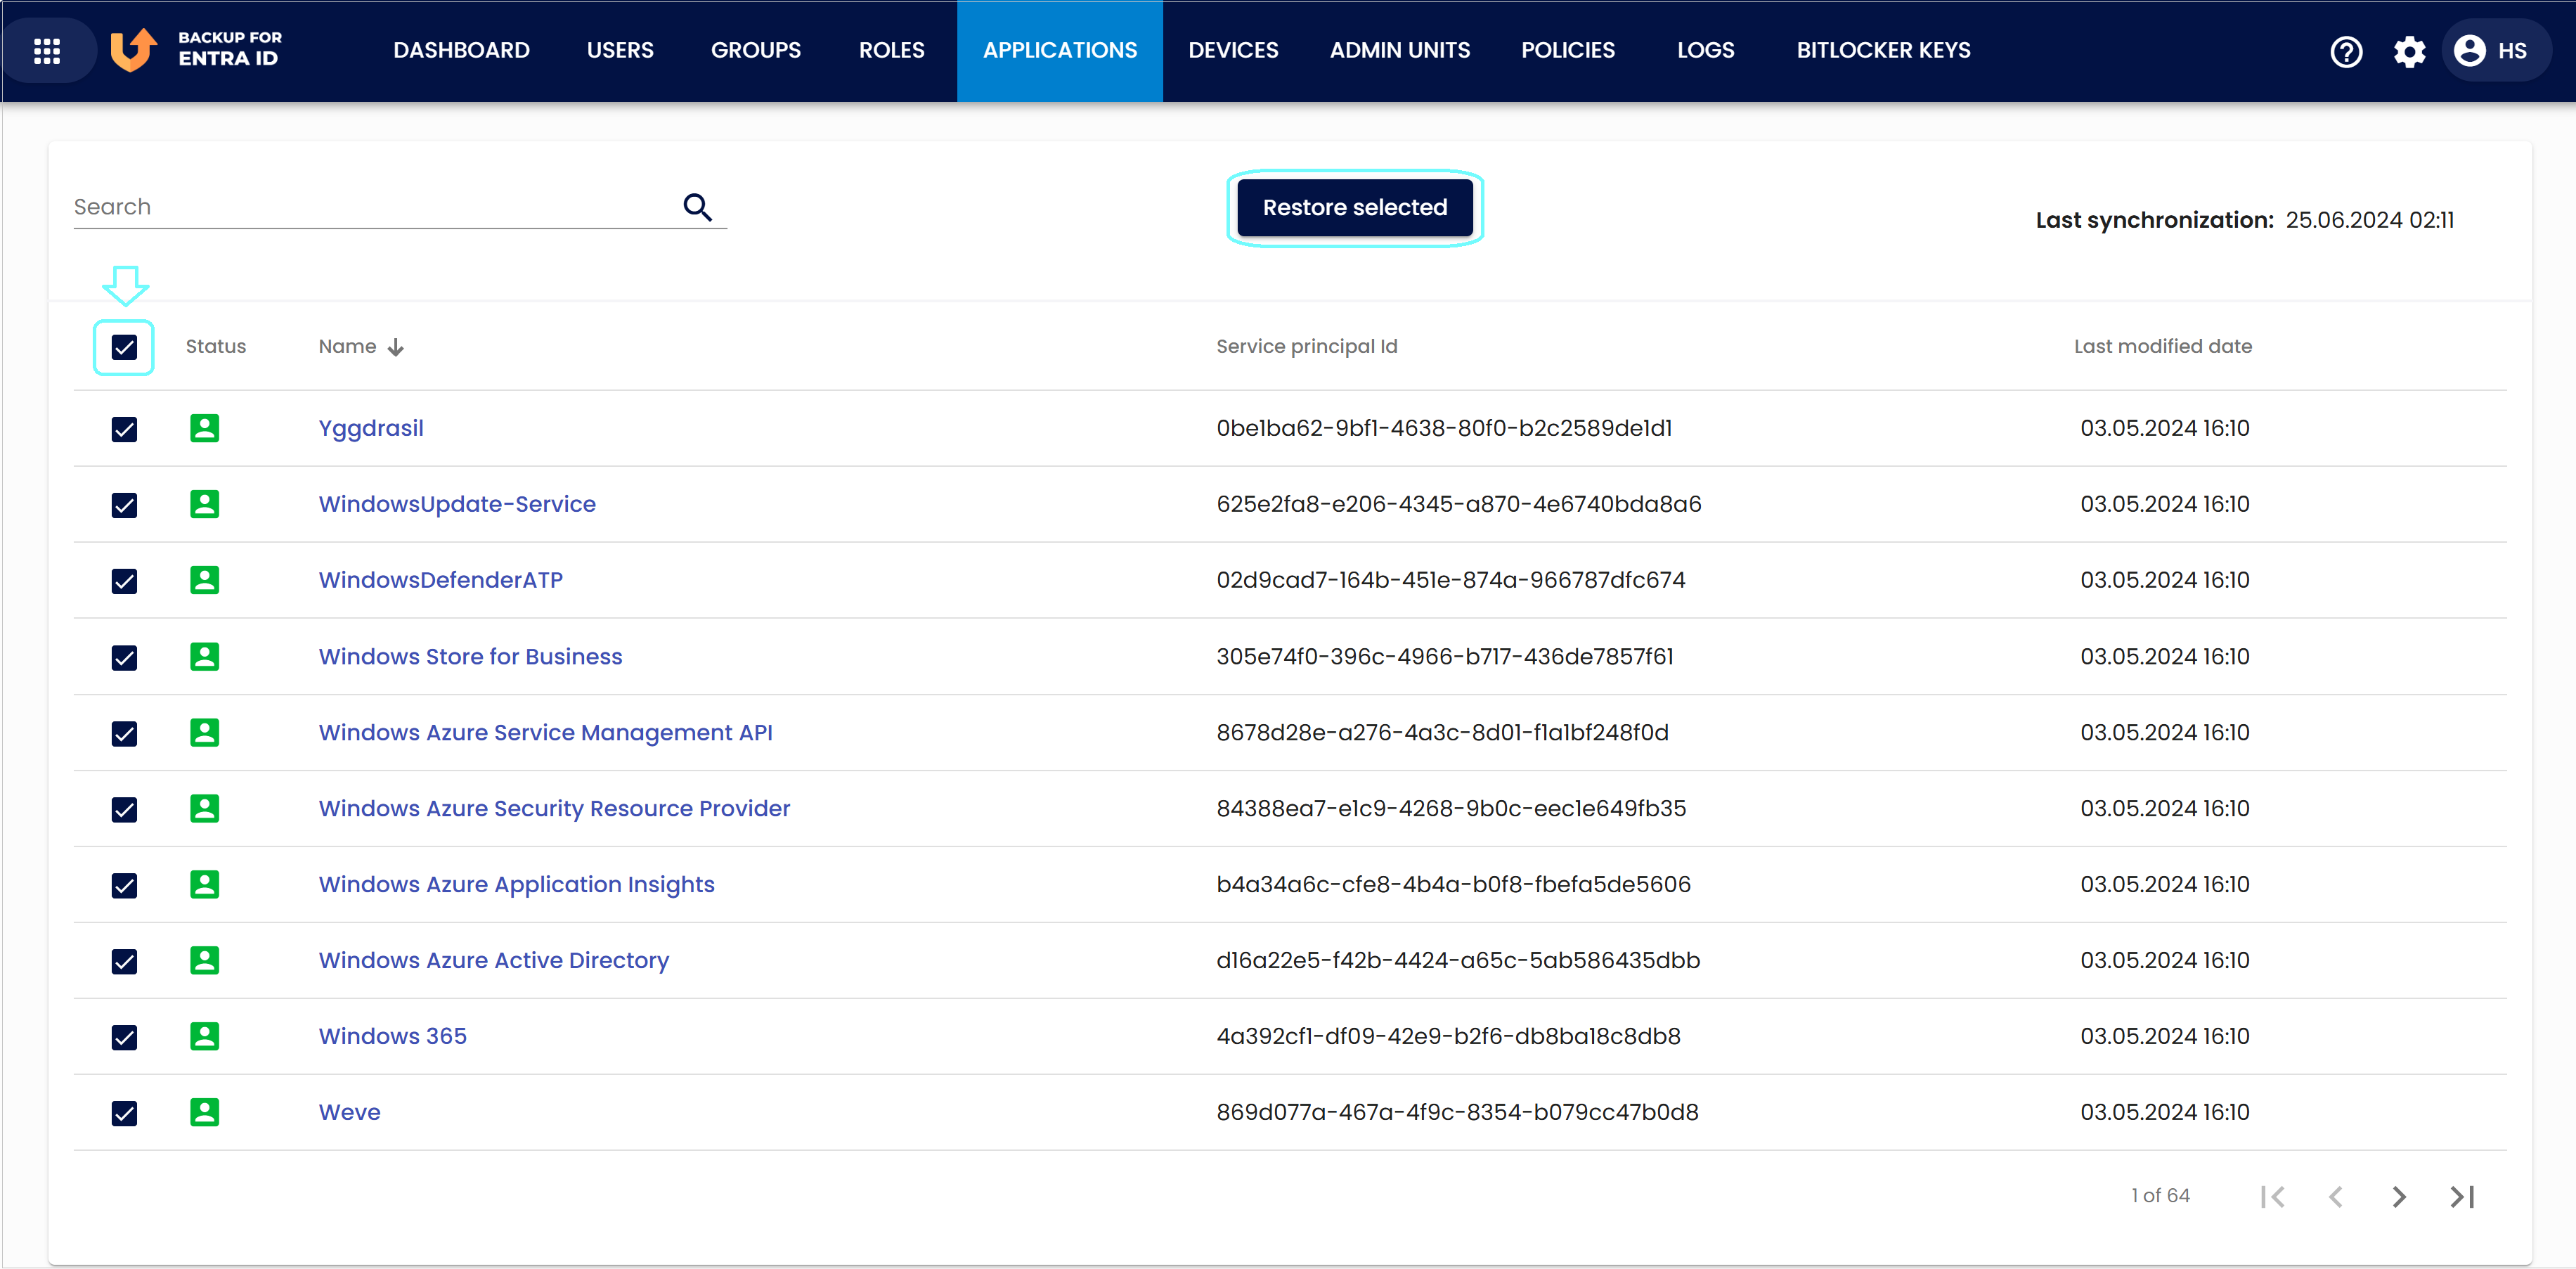
Click Applications in the top navigation and select Enterprise applications. You can see the the list of backed up applications that are set up to use your Microsoft Entra tenant as their Identity Provider.
Step 4. Locate the enterprise application(s)
You can sort the enterprise applications by their Name, Service principal Id or Last modification date. You can also filter the applications by typing any part of the application name or Application (client) ID in the Search box.
Step 5. Select the enterprise application(s)
You can restore all, multiple or just a single enterprise application. When you click any application's name, you can view attributes that have been backed up for the selected application.
Check Step 6 of this support article for more info.
OPTION A: Select all enterprise applications
You can select all enterprise applications to be restored at once by checking the box in the top-left corner of the enterprise applications grid. All enterprise applications in the Entra ID tenant get selected - not just the ones displayed on the current page.
Click the Restore selected button.
Next proceed to Step 7 of this support article to see how to select the restore options.
OPTION B: Select multiple enterprise applications
Select several enterprise applications to be restored by checking the boxes next to each application's name.
Click the Restore selected button.
Next proceed to Step 7 of this support article to see how to select the restore options.
OPTION C: Select and view attributes for a single enterprise application
You may want to see more details for a sprcific enterprise application, e.g. memberships and role assignments. Sometimes it may also be helpful to view and compare the versions between different dates.
Review Step 6. below to learn more.
Step 6. View the application attributes and versions
You can select the enterprise application by clicking it's name. You can see all the attributes that exist for the selected application.
The latest version from backup is always displayed by default. You can click the arrows to browse the different time points / version dates for the object. The selected day's version is always displayed. Red font indicates a changed value for that attribute; i.e. object attributes marked with red font are changed in this version from the previous version.
You can start the restoration by clicking Restore this version.
There are two links: View memberships and View role assignments. From there you can view membership and role assignments for the enterprise application.
Step 6.1. View memberships
By clicking View memberships, you can see the users or user groups that have been assigned for the enterprise application. You can also filter the Membership list view by date and time. You can select any day and time from the calendar to view the version of the selected time point. If the Membership list is empty, there were no users or groups assigned for the selected enterprise application at the selected time.
Changes to the application memberships are recorded in Membership log. From there you can detect the timing of the changes, which will help you to choose the correct version date & time from the calendar.
You can proceed to start the restoration by clicking Restore this version.
Step 6.2 View role assignments
By clicking View role assignments, you can see the admin roles that have been assigned for the enterprise application. You can select any day and time from the calendar to view the role assignments for the application at that time.
Changes to the role assignments are recorded in Role assignments log.
You can proceed to start the restoration from this window by clicking Restore this version.
Step 7. Select restore options
Select the snapshot date & time from the calendar. You can still change the date & time even if you already chose them on any of the previous screens.
Make your choices for the following options:
- To restore the enterprise application with it's attributes, current name and Service principal ID, choose With object. If the application doesn't exist in Entra ID, it will be recreated. If the application already exists in Entra ID, it will be overwritten.
- If you don't select 'With object', you can still restore memberships and role assignments to the already existing application.
- If you select As new, a new enterprise application with a new Service principal ID is created during the restore process. Then you need to input a name for the object that will be created. If you are restoring 'With object' but don't select 'As new', the restoration target is the already existing application in Entra ID.
- NOTE: The 'RESTORE AS NEW' OPTION IS NOT AVAILABLE WHEN YOU RESTORE MULTIPLE ENTERPRISE APPLICATIONS AT A TIME. If you restore multiple applications and an application already exists in Entra ID, it will be overwritten. If the application doesn't exist, a new application will be created with the same name that it was backed up with.
- If you want to restore user or group assignments, select With memberships.
- If you want to restore admin role assignments, select With role assignments.
- If you want to restore the objects to another Entra ID tenant, select To another tenant.
- First you need to add the target tenant where you want to restore the data to - check the instruction.
- Now you can see the existing target tenant(s) in the 'To another tenant' drop-down menu - in case of having multiple target tenants added, select the one you want to restore the data to.
- The available domain names for the selected target tenant can be seen under the 'With domain' menu and you can select the domain from there. Screenshots can be found from the above mentioned support article.
- Start the restoration by clicking Restore.